

Uploading your Excel data directly into QuickBooks is one of those game-changing skills that, once you learn it, you'll wonder how you ever managed without it. Using the built-in "Import Data" tool, you can take a well-organized CSV or Excel file and map your data directly to the right fields in QuickBooks. This lets you upload hundreds—or even thousands—of records in just a few minutes, saving you a massive amount of time.
The Real Cost of Manual Data Entry
Before we get into the step-by-step, let's talk about why this matters so much. Staring at a spreadsheet with hundreds of transactions and knowing you have to key them in one by one isn't just boring; it’s a recipe for burnout and costly mistakes. As a business grows, so does its financial data, and what was once a manageable task can quickly become a bottleneck.

Think about a busy e-commerce store pulling sales reports from Shopify or a consultant tracking dozens of client invoices every month. Typing each entry is not just slow; it's a minefield for human error. A transposed number or a misspelled name might seem small, but these little mistakes can create huge reconciliation headaches down the road.
The Hidden Price of Inefficiency
The real cost of manual entry isn't just the time you spend at the keyboard. It's the bottleneck it creates, preventing you from getting timely financial reports. When you're always playing catch-up on data entry, you can't see a clear, up-to-date picture of your business's financial health. That delay directly impacts your ability to make smart, informed decisions about cash flow, pricing, or inventory.
Switching to bulk importing delivers immediate, tangible results:
- Serious Time Savings: You can reclaim hours, or even entire workdays, each month that were once lost to tedious typing.
- Improved Accuracy: By uploading data directly, you eliminate the typos and mismatches that are almost guaranteed with manual entry. This means cleaner, more reliable books from the start.
- A Shift to Strategy: Instead of being bogged down in administrative work, you can focus on analyzing financial reports and growing your business. For more ways to improve your workflow, check out our guide on essential bookkeeping tools.
The Gains in Numbers
This isn't just a feeling; the efficiency gains are real. A Capterra poll of 2,500 QuickBooks users found that 82% frequently upload Excel files for their bulk transactions. The result? They cut their data entry time by an astounding 75% compared to doing it by hand. For the average accountant, that translated to about 12 hours saved every month. You can dig deeper into QuickBooks integration efficiencies to see how this impacts different workflows.
The real win here isn't just about saving time. It's about changing your role from a data entry clerk to a financial strategist. When you automate the tedious stuff, you free up your brainpower for analysis and decision-making—the work that actually creates value for your business.
At the end of the day, learning how to properly upload Excel files turns bookkeeping from a chore into a streamlined, powerful asset. It's a foundational skill for building a financial management system that can scale right along with your company.
How to Prepare Your Excel File for a Flawless Import
Let's be honest—nearly every single import failure I've ever seen comes down to one thing: a poorly prepared spreadsheet. Getting your Excel or CSV file right before you even think about uploading it isn't just a good idea; it's the most critical part of the whole process.
Think of it as your pre-flight checklist. A clean, properly structured file will glide right into QuickBooks Online, saving you hours of frustration. On the other hand, a file riddled with hidden errors—like extra spaces you can't see, weird date formats, or mismatched column names—is going to get rejected instantly. Then you're stuck trying to decipher vague error messages.
This is my field-tested guide to structuring your files for the most common imports: customers, vendors, products, and even transactions. If you can master these non-negotiable formatting rules, you'll make importing from Excel a smooth, repeatable win.
Start With an Official Template
Before you start building your own spreadsheet from scratch, your very first move should be to grab the official sample files directly from QuickBooks. I've seen too many people try to guess the right column headers and data formats, and it's a surefire recipe for failure. Intuit provides templates that show you exactly what the import tool expects to see.
Here’s how you find them:
- Click the Settings (Gear icon) in your QuickBooks Online account.
- Look under the Tools column and select Import Data.
- Pick the type of data you're bringing in (e.g., Customers, Vendors, Chart of Accounts).
- Right on that import screen, you'll see a link to Download a sample file.
Using these templates takes all the guesswork out of the equation. You'll have the precise column headers QuickBooks needs, like "Full Name" or "Account No.," which prevents the most common reason for an immediate import rejection.
The Universal Rules of Data Hygiene
No matter what you're importing, a few universal rules always apply. Nailing these data hygiene practices will wipe out the majority of common import errors before they even have a chance to happen.
First, your file absolutely must have a single header row in Row 1. The importer is programmed to read this first row to figure out what's in each column. Any extra rows, titles, or merged cells sitting above this header will completely confuse the system and cause the import to fail.
Next, get rid of any formulas, charts, or images. Your import file should be nothing but raw data. A quick and easy way to do this is to copy your entire dataset, then use Excel's "Paste Special > Values" feature. This trick instantly converts everything into plain text and numbers.
Finally, make sure there are no blank rows anywhere in your data. A blank row can act like a stop sign for the importer, causing it to stop reading your file prematurely. You'll be left wondering why only half your data made it in.
Formatting Key Data Fields Correctly
Certain fields are just notorious for causing problems if they aren't formatted perfectly. Pay extra close attention to these columns—it will save you a massive headache later.
The most common tripwire by far is the date format. QuickBooks Online is incredibly strict about this and usually demands the format MM/DD/YYYY. Even if the dates look right in your spreadsheet, the cell's underlying format might be something else entirely. Just highlight your date columns, right-click, choose "Format Cells," and explicitly set the format to what QuickBooks wants.
Another tricky area is accounts and sub-accounts, especially when you’re importing your Chart of Accounts. If you want to import a sub-account, you have to format it as Parent Account:Sub-account all in a single cell. For instance, to make "Web Hosting" a sub-account of "Utilities," the cell must contain exactly this: "Utilities:Web Hosting". It's also critical that your account names in Excel match the ones in QuickBooks perfectly. For more on this, check out our accounting guide for Chart of Accounts.
Pro Tip: Watch out for invisible culprits like trailing spaces. To QuickBooks, "John Smith " (with a space at the end) is a completely different person than "John Smith" and will create a frustrating duplicate record. The best way to fix this is to use Excel's TRIM function (
=TRIM(A1)) in a new column to clean up all your text before finalizing the file.
A Quick Reference for Required Fields
While the official templates are your best friend, sometimes you just need to know the bare minimum to get the job done. This table is a handy cheat sheet for the essential columns you'll need for the most common imports.
Essential Columns for Common QuickBooks Imports
| Data Type | Required Fields | Optional but Recommended Fields |
|---|---|---|
| Customers | Customer Name (or First Name and Last Name) |
Email, Phone, Billing Address, Shipping Address, Company |
| Vendors | Vendor Name |
Email, Phone, Address, Account No., Website |
| Products/Services | Product/Service Name, Type (Service, Non-inventory) |
SKU, Description, Sales Price/Rate, Income Account, Expense Account |
| Bank Transactions | Date, Description, Amount (or Credit and Debit) |
Check No. |
Just remember, any accounts you list in your file (like an Income Account or a Bank Account) must already exist in your QuickBooks Chart of Accounts. The import tool can't create new accounts on the fly during an upload.
Taking the time to prepare your spreadsheet meticulously is the single most important thing you can do to make sure your data flows into QuickBooks seamlessly.
Diving In: A Step-by-Step Look at the QuickBooks Import
Alright, you’ve put in the work and your Excel file is prepped and ready to go. Now for the satisfying part: getting that data into QuickBooks Online. This is where we’ll walk through the native import wizard, the bridge between your spreadsheet and your accounting software.
Think about a real-world scenario. You just wrapped up a trade show and came back with a spreadsheet of 100 new leads. Instead of blocking out an afternoon for mind-numbing manual entry, you can get them all into QuickBooks in the time it takes to grab a coffee.
This whole process really boils down to three key stages: structuring your file, formatting the data, and validating it before the final import.
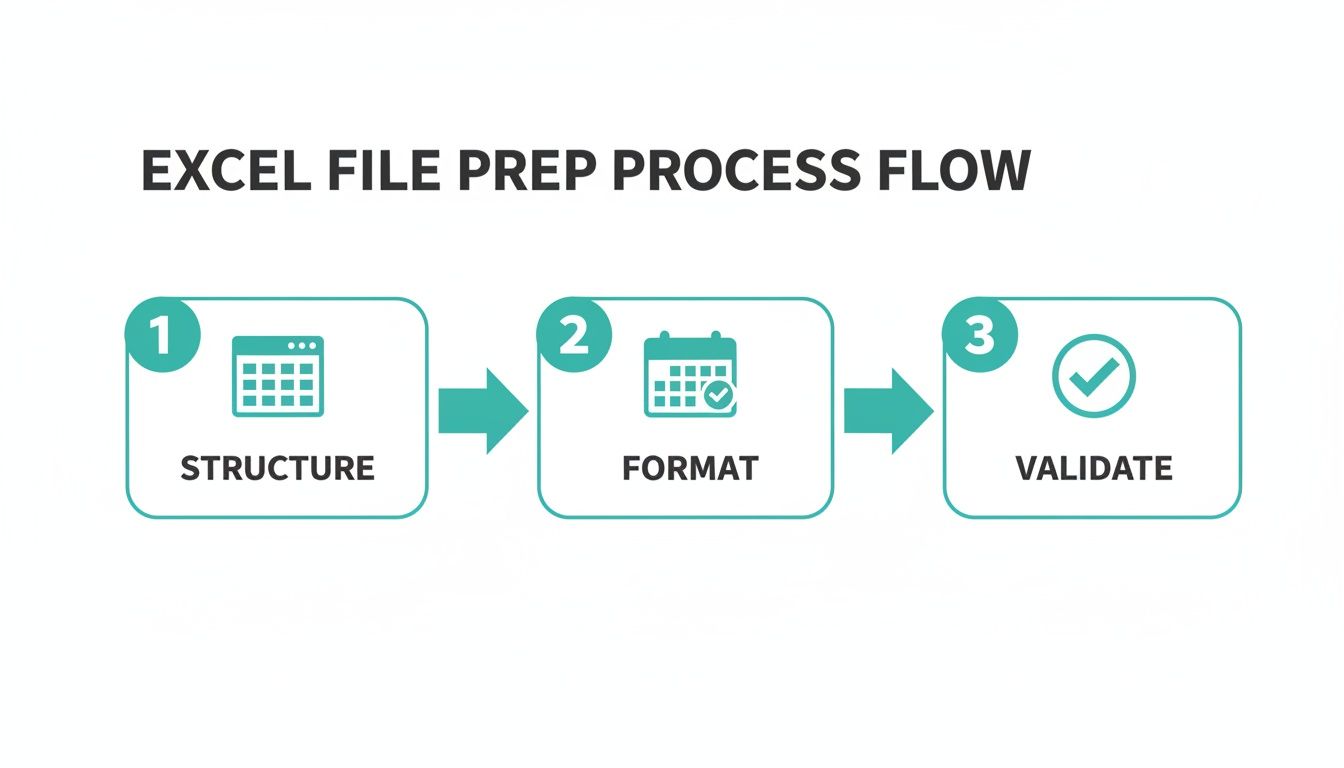
Get these three pillars right, and you're setting yourself up for a smooth, error-free import every time.
First, Finding the Import Data Tool
Before you can import anything, you have to find where QuickBooks keeps the tool. It's tucked away in your settings, which is the command center for all your company's backend configurations.
Just click the Settings gear icon you see in the top-right corner of your dashboard. A menu will drop down. Look under the "Tools" column for Import Data. That’s your gateway.
Clicking it takes you to the main import hub, which is the starting point for bringing in all sorts of information. It clearly lays out all the different lists you can import, from bank transactions and customers to invoices and even your chart of accounts.
From this screen, you’ll pick what you're importing. For our trade show example, we're adding new customers, so we'd click the "Customers" box. This kicks off the specific wizard for that data type.
The Make-or-Break Step: Mapping Your Fields
After you select your data type and upload your file, you'll land on what is hands-down the most critical part of the process: mapping. This is where you translate your spreadsheet for QuickBooks, telling it exactly what each column of your data means.
The mapping screen is pretty straightforward. It shows QuickBooks Online fields (like "Customer Name," "Email," "Phone") on one side. On the other side, you'll see dropdown menus filled with the column headers from your spreadsheet. Your job is to play matchmaker.
You’ll tell QuickBooks that your "Client Full Name" column should go into its "Customer Name" field. Your "Contact Email" column lines up with its "Email" field. You get the idea.
My Two Cents: Don't rush the mapping. I've seen it happen—someone accidentally maps their "Phone" column to the QuickBooks "Fax" field, and suddenly, no one can find a customer's phone number. Slow down here and double-check every single match.
QuickBooks is pretty sharp and will try to auto-map columns if your headers are similar to its default fields (this is a huge reason to use their templates!). But don't trust it blindly. Always review every single suggestion to confirm it’s 100% correct. If you have a column in your sheet that QuickBooks can't figure out, it will be marked "No Match." You can then either find the right field for it or just tell QuickBooks to ignore that column if it’s not needed.
The Final Check: Preview and Validate
The good news is that QuickBooks doesn't just dump your data in right away. It gives you a final chance to catch mistakes on the preview and validation screen. Think of it as a dress rehearsal.
This screen shows you the first handful of rows from your file, laid out exactly how they’ll look inside QuickBooks after the import. Use this opportunity to spot-check for any obvious problems.
- Eyeball the Data: Do the names look right? Are the email addresses where they should be? Is the billing address broken out correctly into street, city, state, and zip?
- Look for Red Flags: QuickBooks will highlight any rows with issues. It might flag a customer name that’s already in your system or point out a row that’s missing required info.
- Fix on the Fly: For any errors it finds, QuickBooks gives a little explanation. You can either back out and fix the problem in your original Excel file or, for some minor things, you might be able to correct them right there on the screen.
In our scenario with 100 new leads, the preview might show that two of them were already existing clients. QuickBooks will flag these as potential duplicates, letting you uncheck them so you don't create messy, redundant records. This step is a fantastic safety net. You can see more detailed examples in our QuickBooks guide on transaction importing.
Hitting the Green Light: Finalizing the Import
Once you’ve scanned the preview screen and feel confident that everything is clean and mapped correctly, you’re on the home stretch. Just look for the "Import" button at the bottom of the screen.
When you click it, the magic happens. For a list of 100 customers, it’s almost instant. A confirmation message will pop up telling you exactly how many records were successfully brought in.
That's it! You've officially done it. Those 100 new customers are now sitting in your QuickBooks account, ready for invoicing. Once you get the hang of it, this process becomes an incredibly powerful and time-saving tool in your bookkeeping arsenal.
Solving Common Import Errors and Mismatches
Even with a perfectly prepped spreadsheet, importing data can feel like a roll of the dice. You click "Import," cross your fingers, and… an error message pops up. It's frustrating, but I promise you, it's a completely normal part of the process when you're uploading Excel to QuickBooks. The key is knowing what these cryptic messages actually mean and how to fix them on the fly.

Think of these errors less as failures and more as QuickBooks giving you direct feedback. It's pointing out exactly what it doesn't understand about your file. This section is your decoder ring for the most common issues, designed to turn that moment of frustration into a quick fix.
Deciphering the Most Common Error Messages
When an import fails, QuickBooks usually gives you a reason. These messages aren't just generic warnings; they point to specific problems in your spreadsheet. Let's break down the frequent offenders and what they’re really telling you.
One of the most common is the dreaded "We can't find a matching category" or "Account not found" error. Nine times out of ten, this just means the account name in your Excel file (like "Office Supplies") doesn't perfectly match an account name in your Chart of Accounts.
The solution is pretty straightforward:
- Open your Chart of Accounts in another browser tab.
- Compare the account names in your sheet line-by-line against your official list in QuickBooks.
- Fix any differences in your Excel file. Even a tiny variation like "Travel" versus "Travel Expenses" will trigger this error.
Another frequent roadblock is the "Duplicate Name Exists" warning. This pops up when you try to import a customer, vendor, or item that's already in your QuickBooks file. QuickBooks flags this to prevent you from creating messy, redundant records, which can cause a real headache for your accounts receivable down the line. To keep this area of your books clean, it’s worth reviewing some best practices for managing accounts receivable.
Fixing Formatting and Data Mismatches
Sometimes, the problem isn't an obvious error but a subtle formatting issue you can't even see. These are the silent killers of a smooth import.
Date format mismatches are a classic example. Your spreadsheet might use DD-MM-YYYY, but QuickBooks is expecting MM/DD/YYYY. The import preview screen is your best friend here. If you see jumbled or clearly wrong dates, head back to your spreadsheet and reformat that entire column.
Special characters can also throw a wrench in the works. Things like ampersands (&), commas (,), or pound signs (#) in names or descriptions can sometimes confuse the importer. It’s a good habit to scrub these from key fields like customer names or product SKUs before you even try to upload.
A Real-World Scenario: A client once spent an hour trying to import a product list, getting a vague error every time. The culprit? An invisible trailing space at the end of every single product name in their spreadsheet. To QuickBooks, "Widget " is not the same as "Widget." We fixed it in 30 seconds with Excel’s TRIM function.
The Post-Import Checkup and How to Undo
Getting that "Success!" message is a great feeling, but you're not done just yet. The final, and arguably most important, step is verification. Never just assume everything landed perfectly. You need to do a quick reconciliation to confirm the data is accurate and in the right place.
Here’s a simple post-import checklist I run through:
- Spot-Check Records: Open a few of the newly imported customers or vendors. Are all the fields—address, phone, email—populated correctly?
- Run a Quick Report: For transactions, I'll run a quick Profit & Loss or a Transaction List by Date report for the period I just imported. Does the total look right?
- Review the Bank Register: If you imported bank transactions, jump over to the register for that account. Do the debits and credits make sense?
But what if you spot a major problem? Don't panic. For bank transactions, QuickBooks has a built-in safety net. You can select them in the For Review tab of your bank feed and choose Exclude. This yanks them out before they ever officially hit your books.
For lists like customers or items, the process is also thankfully straightforward. You can filter the list by the date it was added, select all the records from your bad import in one go, and then either make them inactive or delete them entirely. This "undo" button is your get-out-of-jail-free card, letting you reverse a mistake without creating a bigger mess.
Beyond the Basics: Advanced Tools for Heavy-Duty Data Imports
While QuickBooks' built-in import tool is a lifesaver for getting your initial lists set up, you'll quickly discover its limits as your business grows. When you find yourself needing to import complex transactions like invoices or bills on a regular basis, or you're wrestling with massive datasets, it’s a clear sign you need to look beyond the native features. This is where more powerful, automated solutions for getting your Excel data into QuickBooks really shine.
These advanced tools are built for businesses swimming in data. I'm talking about e-commerce stores processing hundreds of daily sales, contractors juggling complex job costs across dozens of projects, or any company that needs to import detailed payroll journal entries from another system. For these kinds of workflows, a simple list import just won't cut it.
The Game Changer for QBO Advanced Users: Spreadsheet Sync
If you're already on the QuickBooks Online Advanced plan, you have a seriously powerful tool at your fingertips: QuickBooks Spreadsheet Sync. This is so much more than a simple importer; think of it as a live, two-way bridge connecting Excel directly to your QuickBooks data. Instead of just pushing a static file into QBO, Spreadsheet Sync lets you pull live data out of QuickBooks, tweak it in Excel, and then sync your changes right back. You can even create brand new records from your spreadsheet.
Let's say you want to build a custom financial dashboard in Excel. With Spreadsheet Sync, you can design reports that pull real-time numbers directly from your QuickBooks accounts. When you hit refresh on the sheet, your P&L, balance sheet, or a custom sales report instantly updates. This live connection means no more exporting report after report, giving you a single, reliable source for your financial analysis.
The impact here is huge. According to Intuit's own studies, businesses using QuickBooks Spreadsheet Sync have seen a massive 65% reduction in time spent on manual data work. You can get more details about this powerful sync feature on craftybase.com.
When Do You Need a Third-Party Import Tool?
Spreadsheet Sync is fantastic for reporting and bulk editing, but for high-volume transactional imports, dedicated third-party apps are king. Tools like SaasAnt Transactions or Business Importer are purpose-built to handle the tricky stuff QuickBooks’ native importer avoids, like invoices with multiple line items, bills, checks, and complex journal entries.
From my experience, these tools are a must-have for businesses that:
- Need to import transactions regularly. If your workflow involves uploading sales invoices, vendor bills, or expense reports from a spreadsheet every week or month, a third-party tool will save your sanity.
- Want better error handling. They provide incredibly clear error reports that tell you exactly what's wrong with your file and often how to fix it. This beats the frustrating guesswork of the native importer.
- Crave an "undo" button. This is the killer feature. If you upload 500 invoices and realize there's a mistake, these apps let you roll back the entire import with one click, leaving your books clean.
Comparing Your Options
So, which tool is right for you? It really comes down to what you're trying to accomplish.
| Feature Comparison | QuickBooks Spreadsheet Sync | SaasAnt / Business Importer |
|---|---|---|
| Best For | Real-time reporting, bulk editing existing data | High-volume transactional imports (invoices, bills) |
| Data Flow | Two-way (pull from QBO, push back to QBO) | One-way (push from Excel to QBO) |
| Key Feature | Live data connection for dynamic dashboards | "Undo" rollback, advanced error handling |
| Ideal User | QBO Advanced user needing deep analytics in Excel | Businesses of any size with recurring, complex imports |
Ultimately, as your business gets more complex, your approach to data management has to evolve right along with it. For many growing companies, the conversation naturally shifts from just keeping the books to optimizing the entire financial workflow. This is often the point where exploring strategies like outsourced bookkeeping for small businesses becomes a logical next step, freeing you to focus on the big picture instead of data entry.
Whether you harness the live reporting power of Spreadsheet Sync or the transactional muscle of a third-party app, these tools are your roadmap to scaling your bookkeeping efficiently.
Frequently Asked Questions
When you start digging into the details of uploading Excel files to QuickBooks, the same questions tend to surface again and again. I've been there. Getting straight answers to these common sticking points can save you a massive headache, so let's clear them up right now.
Can I Import Bank Transactions from Excel?
Yes, you absolutely can, and honestly, it’s one of the most powerful import functions QuickBooks offers. You can upload bank transactions from a CSV file using either a simple 3-column format (Date, Description, Amount) or a more detailed 4-column format (Date, Description, Credit, Debit).
To get this done, just head over to the Banking tab and look for the 'File Upload' option. From there, it's the same mapping process you'd use for any other list. This feature is a real lifesaver in a couple of common situations:
- Catching Up on Old Data: Perfect for pulling in years of historical transactions from a bank account that no longer connects directly to QuickBooks.
- Third-Party Processor Info: Essential for getting detailed sales and fee data from platforms like Stripe, PayPal, or Square into your books accurately.
Is There a Limit to How Many Rows I Can Import?
QuickBooks Online does have some built-in limits to keep things running smoothly. For lists like customers, vendors, and your chart of accounts, you're generally capped at 1,000 rows per import. The file size itself also needs to stay under 2MB.
So, what if you have a customer list with 5,000 contacts? The trick is to break it down. You'll need to split that large file into several smaller ones and upload them in batches of 1,000 or less. It's a bit of extra prep work, but it gets the job done. If you find yourself doing this constantly, it might be time to look into a dedicated third-party import tool for a more permanent solution.
My Two Cents: Don't try to push the limits. For big datasets, just commit to splitting the file into smaller chunks from the start. It’s the most reliable way to avoid having the import time out or fail completely.
What if I Mess Up an Import? Can I Undo It?
You can, and it's a huge relief to know there's a safety net. The exact steps to reverse an import depend on what kind of data you just uploaded.
If you made a mistake with bank transactions, the fix is easy. Go to the For Review tab in your bank feed, check the boxes for all the transactions from the bad upload, and just hit Exclude. This pulls them right out before they ever mess with your actual bookkeeping.
For lists like customers or products, you can usually filter the list view by the date they were created. This will isolate everything from your recent import. From there, you can select them all in bulk and either delete them or mark them as inactive. A good habit is to take a quick mental note of how many customers or items you have before you start—it makes spotting and cleaning up any errors much faster.
At Bugaboo Bookkeeping, we specialize in transforming tangled bookkeeping problems into simple, automated systems. If you're running a business in Washington and are ready to ditch the manual data entry grind, let's talk. You can schedule your free consultation with us today.


